Steampunk Home Decor – Light Switch Plates
 A couple of months ago The Lady and I came to the realization that we had painted the walls and woodwork in every room in our home except for the master bedroom. Our house was built in the 1970's and this means beige and brown decor. Thus, our bedroom was just about the most depressing of any of the rooms in our home.
We set about to remedy this post haste! We began by painting the walls a pleasant sage green and changing the woodwork from a dark brown stained pine to a contrasting French Cream.
When it came time to change out the light switch plates, I thought I'd make a few in the Steampunk style.
More after the cut . . .
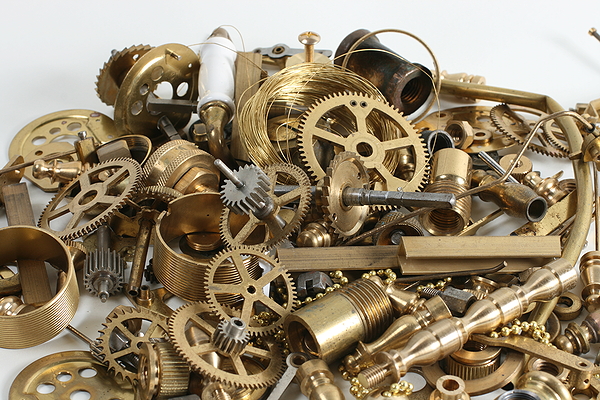
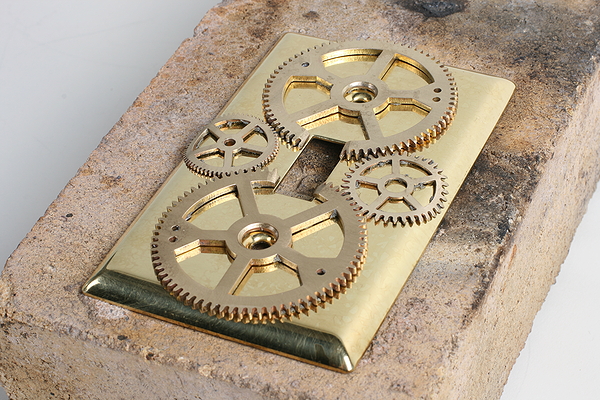
Step one was to gather material, so I dumped out my box of small brass bits and fished through them for some likely candidates. These have been lovingly collected over the years from many sources, but most came from our town dump.
The chosen bits I intended to solder on to solid brass lightswitch cover plates.
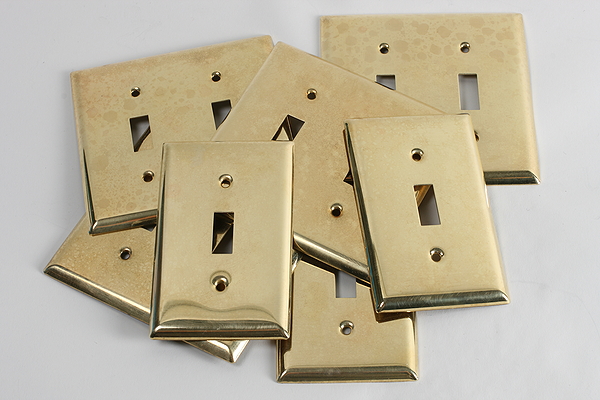
The brass lightswitch covers came from Home Depot. Note to self: be sure to look closely at the packaging. The first batch I bought turned out to be "brass plated" and the "brass" came off when I applied the paint stripper to remove the clear protective varnish. I set them aside and went back to buy some solid brass replacements.
(The "brass plated" covers appeared to be nickel plated under the yellow varnish, so I will attempt to electrolytically copper plate those some other time.)
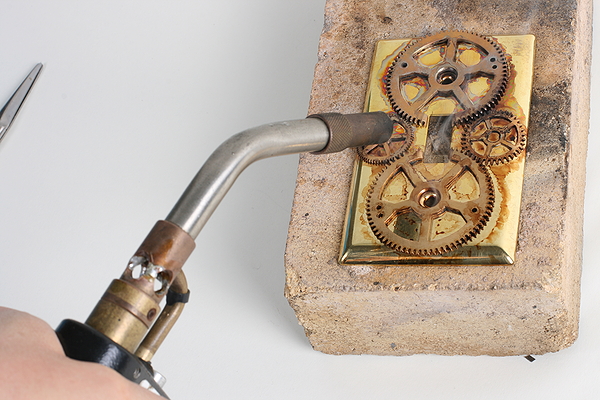
I tried a couple of different methods of soldering. First, I hammered a length of regular electronic solder into a flat ribbon and then snipped a bunch of small pieces off with some scissors. These I placed under the parts I wanted to attach and then I heated the whole assembly with a torch until the solder flowed.
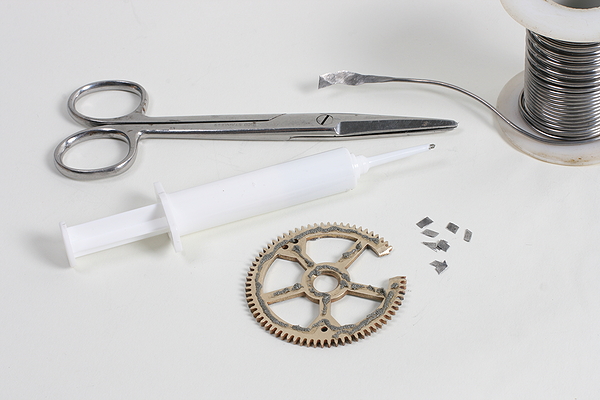
I also tried using a solder paste sold at autoparts stores. This paste contains a mixture of solder particles and flux and is even easier to use then the cut pieces of solder ribbon.
Once my parts were laid out I heated the whole assembly with the torch until the solder flowed.
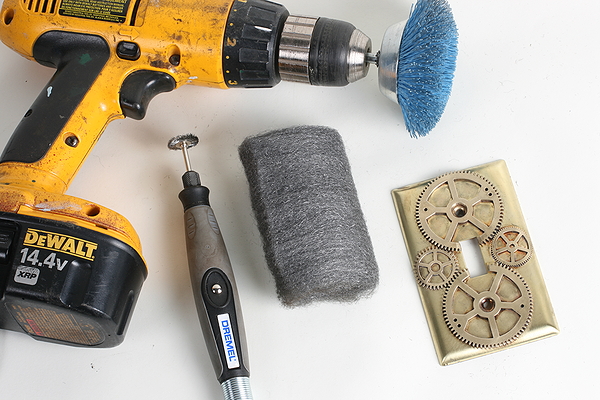
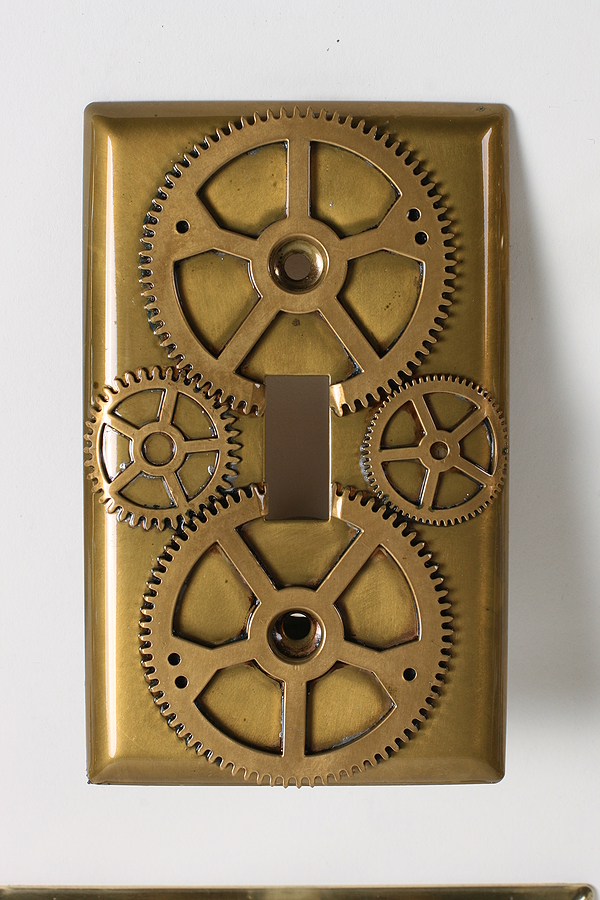
After the plates cooled I cleaned them up with a variety of tools and buffed them to a nice shine.
I wanted the plate I chose for the bedroom light switch to have more of an aged appearance so I sealed it in a plastic container with a couple of tablespoons of ammonia.
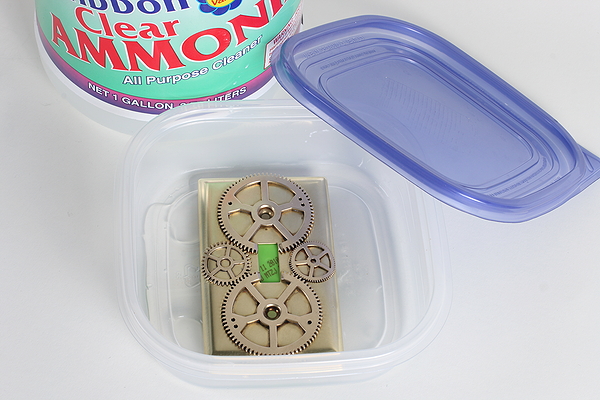
After about 6 hours it took on a lovely patina.
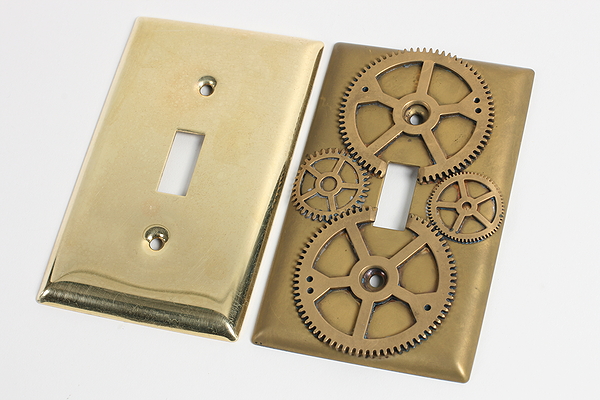
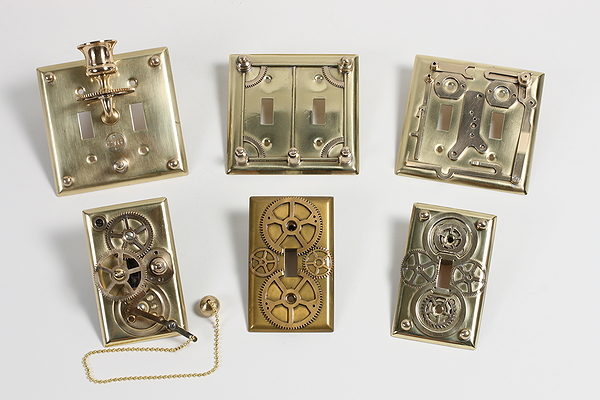
I made a variety of different patterns, each suggested to me by the bits of brass scrap I found in my collection.
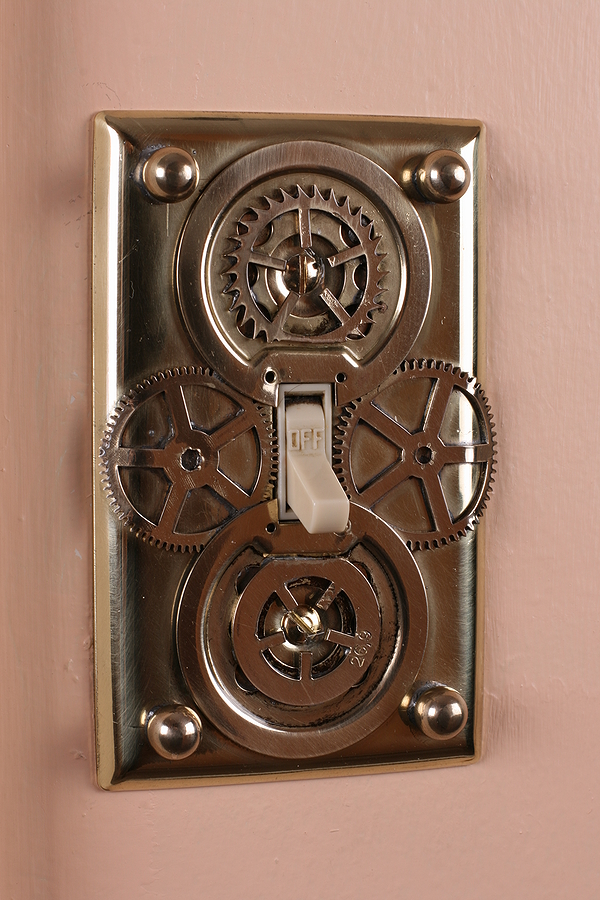
This is the one I ultimately chose for our bedroom.
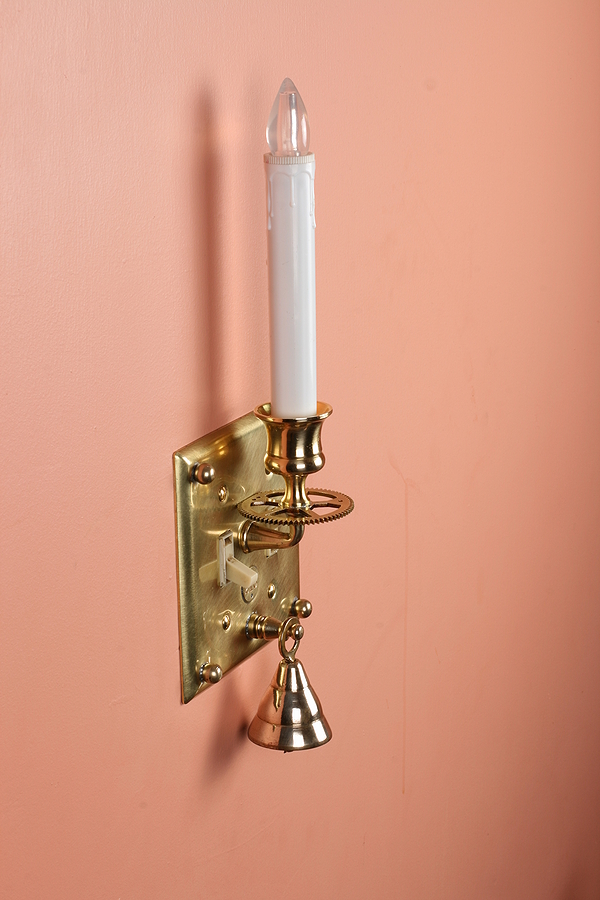
This one is my favorite and now resides in our living room. The LED candle lights when it's dark allowing you to easily locate the light switch. This particular switch is located next to The Ladies favorite chair so I incorporated a bell so that she may easily summon a servant to refill her morning espresso.
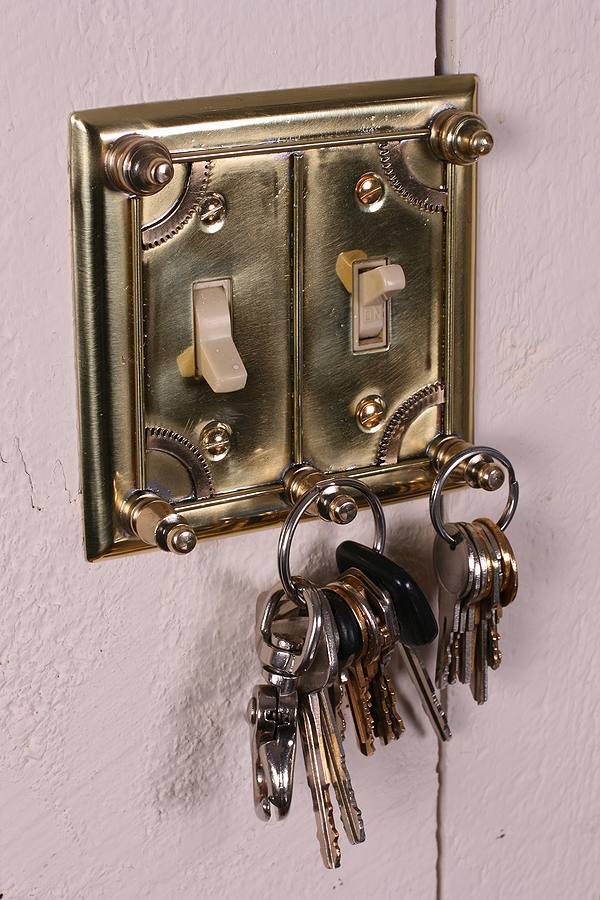
This one stands by the front door and safeguards our key rings.
The upstairs powder room light.
This one was fun to make but proved rather awkward to use so it went back in the box of brass bits to become a donor for future projects.
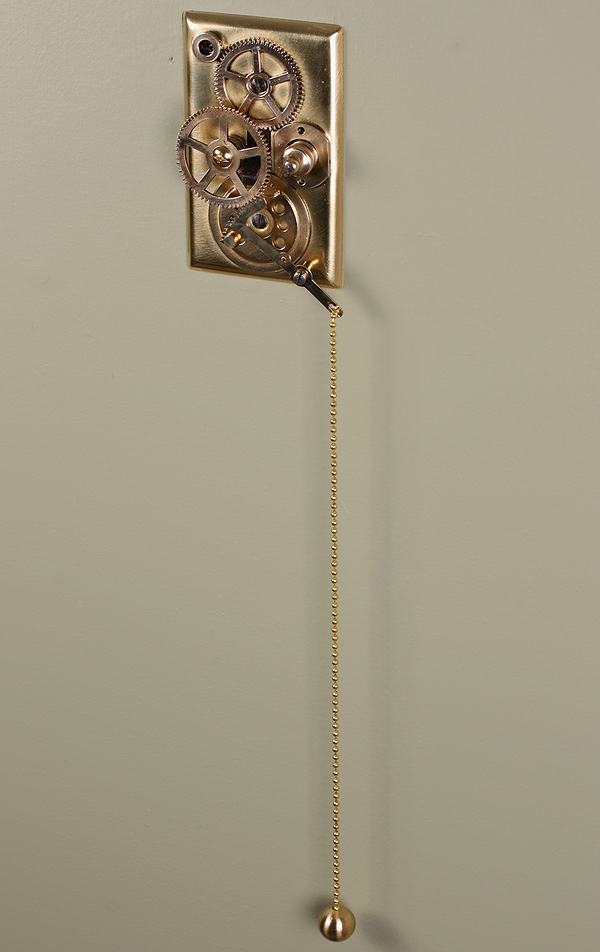
Wants steampunk, but uses flip switches rather than pushbutton?
Your last one that was awkward to use could be made more functional
if you added a long strip of metal on axis with the gear centered and then added two chains! Pull one for off and pull the other one for on! You would have to relocate the gear from its current position of course! These are a great idea! Love them!
So do u sell any step unknown items?
These are awesome. Some time ago while doing a pinterest search I came across the one you used in the master bedroom and I saved the image as an idea on my computer. It popped up again in a search and I clicked open the photo that took me to this page. I love all them.
Totally wonderful switch plates! I love them all!
You need to open a store!!!
I adore the one you found difficult to use and took down. If you’re ever considering selling it I would be very interested.
hello,
do you sell these. my husband loves steampunk and i have been looking for a light switch and your is the only ones online that i like.
pls adv.
thanks, Jana
So beautiful but it is a pity that the thing «on-off» is still so ugly.
I wonder if the plastic parts could be painted with a matching metallic paint?
I’m looking for switchplate cover ideas and found your page – I love these!! Thanks for much for sharing – you’ve inspired me!
Terry