Home

Twitter

Related Stories:

Old circuit board
The North Skirt
Lastwear Kickstarter Project needs your support
Solderable conductive thread
How to Make a Large Flash Diffuser
Gentleman's Emporium
Steampunk Philosophy

Sew-through Soft Circuits

Meredith Scheff — Wed, 04/28/2010 - 18:52

Your mostly-humble narrator

I've had an off-and-on love affair with soft circuits since I became aware of them. Unfortunately, all the pre-made boards for soft circuits are clumsy (being traditional hard PCBs) and finnicky (hard to keep a good connection) to use.

Being a good little hacker, I decided to make my own.

Way more after the jump...


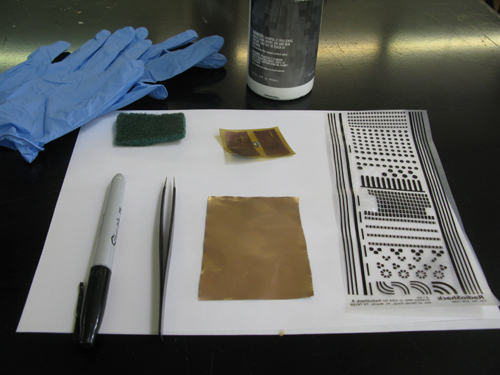
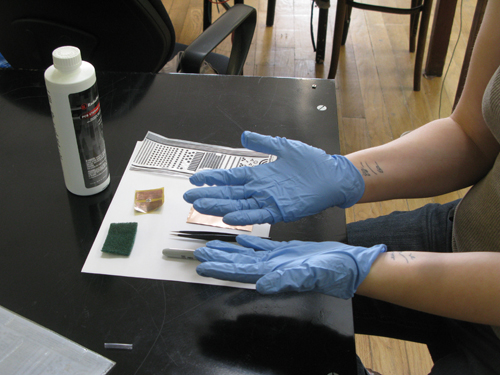
Here's all the stuff I used. From left to right-ish: Gloves, scotch brite to pre-sand the boards, a board I made earlier (credibility), Etchant (ferric chloride), rub on pad/trace patterns, nice new sharpie, super tweezie-tweezers, flexi PCB. Not shown: a sponge cut into 4ths to etch with.


so thin it needs a sandwich

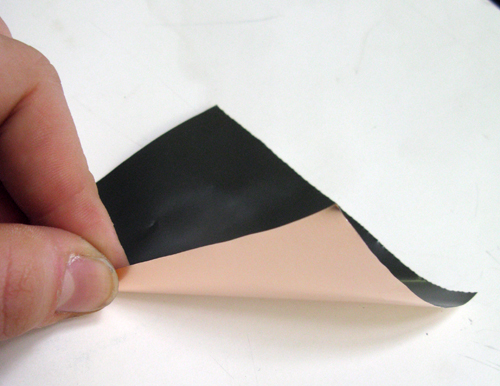
The material I used was DuPont's Pyralux Copper Clad Laminate (whew, a mouthful). Fellow Noisebridge pal Eric Boyd had requested a 'sample' from DuPont- and recieved a whopping 10 square feet of the stuff. The type he requested is super thin and flexible, as you can see. It comes with one side totally blank copper laminate.


I like my ground planes like I like my men: flexible, square, and I can't believe I'm making this joke.

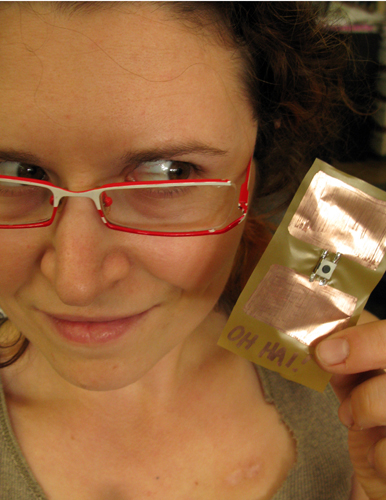
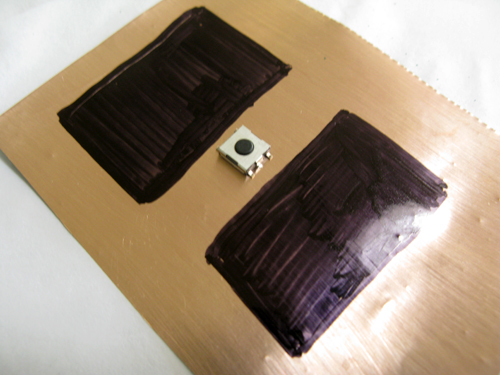
I've already made a few boards like this for my LEDs. This time I need a button. For, you know, pushin', turnin' stuff on. You know. A button. This is the only SMD one Radio Shack carries.

The most important difference with this technique/material is the ability to sew right through the board with conductive thread. Design wise, that means you want to plot out nice biiiiiiiiig pads for your machine to run through. You can trim the material afterwords.

Leave about an 1/8 inch area on either side of your part(s). I wanted to be able to trim them pretty small if I felt like being sadistic. I usually leave a nice big '+' and '-' open area in the sharpie'd area for ease of ID later. This time, however, I forgot. Boo.

PCB's are notorious floozies. Make sure to wear protection when handling them. (...)

Just kidding! Wear gloves to protect the boards from your meat-bag finger oils. Even a little touch can ruin your etch.


(LOLz)

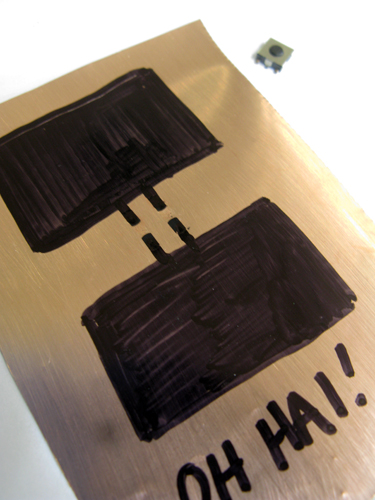
This is the completed board, before etching, with uh..notations. Ya, notations.

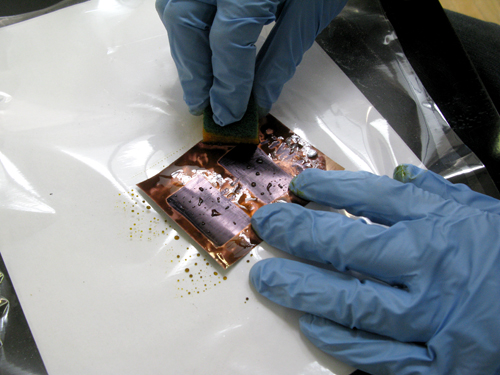
I used the sponge method for etching. It's way faster and easier, which is great, because I'm super lazy efficient. 

Exiting!

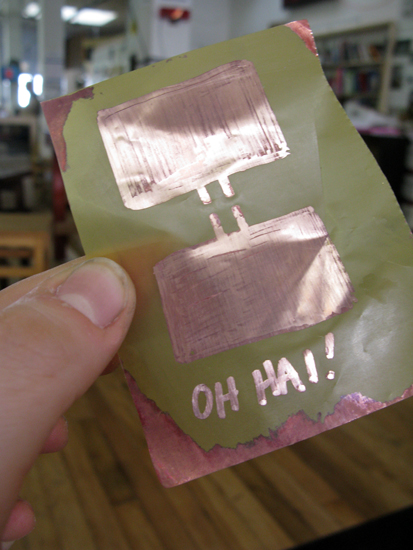
Etched and cleaned circuit. I didn't bother to get the edges, as they're going to be trimmed off anyways. See note above re: efficiency. You can use rubbing alchohol to get off the sharpie.

Also, make sure to dispose of the etchant fluid correctly, so the members of your hackerspace don't kick your a**.


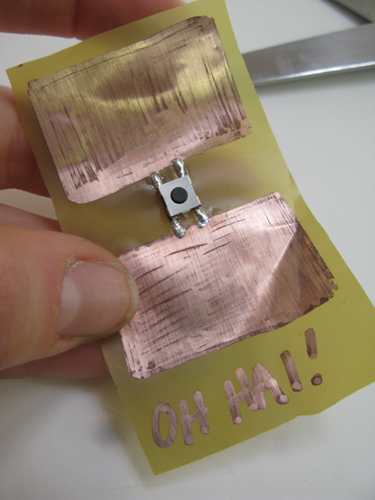
Here's the board trimmed and with my button soldered on...the wrong way. AS A DEMO. Demo is: I did it wrong. Then I fixed it.


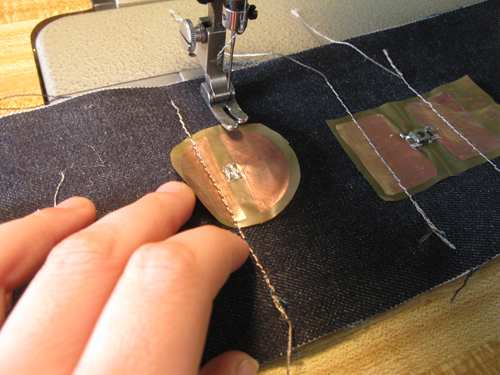
Where these boards really shine: I can sew right through on the machine, and since there are so many contact poins, the connection is really good and tight. Make sure to set your stitch length as long as possible to prevent tearing. Zig zag would be better, but our machine doesn't do that. You can see my button already sewn on to the right- I was too excited and forgot to take a photo. This is a SMD LED board make previously.

Since you are using the machine, It's really easy to make curves or sharp turns to complete your circuit. To attach a new 'trace', simply sew back over the thread it needs to connect to- which has the added bonus of making it a lock stitch.

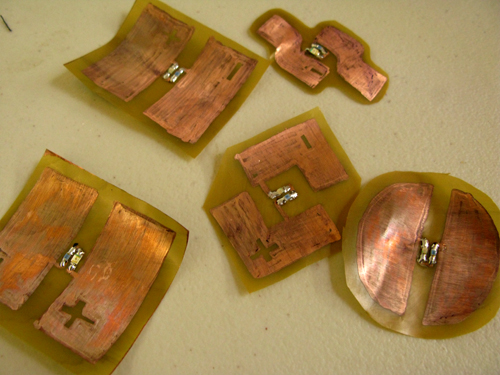
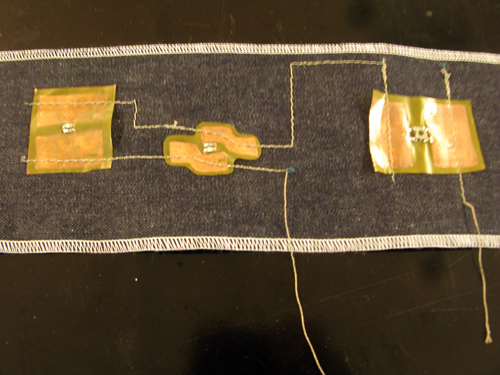
That's it! Here are some more shapes I have experimented with. I am trying to find an economical way to have these proffesionally done so I can sell them to you, the reader.

  • Meredith Scheff
  • Projects
  • tutorials
  • Login or register to post comments

Comment viewing options

Select your preferred way to display the comments and click "Save settings" to activate your changes.

What is the part number for the Dupont Pyralux?

mmmpork — Thu, 06/17/2010 - 22:02

Hi Meredith,

Thanks for posting this tutorial. I'm looking at the Dupont website to request a sample of the Pyralux stuff and I need to provide a part number. From looking at the datasheet PDF, there are a few to choose from -- http://www2.dupont.com/Pyralux/en_US/assets/downloads/pdf/APclad_H-73241.pdf

The part number is dependent on the dielectric thickness and the copper thickness. If your not sure of the part number could you post the thicknesses of the product you're using?

Thanks,
Augustina

  • Login or register to post comments

Cool!

Reverend Ender — Sun, 05/23/2010 - 22:18

What does it do?

  • Login or register to post comments

Very interesting!! I wonder

daeman — Sun, 05/23/2010 - 17:04

Very interesting!! I wonder how these soft PCB compare to electrotextiles in ease of use and durability... I've been playing around with a few samples ( http://www.mutr.co.uk/index.php?cPath=6_572 ), I must say electrolycra is pretty neat used as a stretch sensor.

  • Login or register to post comments

flex and stretch

DavidCary — Tue, 06/01/2010 - 19:02

It looks like Meredith Scheff is using the same flex circuit material I've used; I can't stretch it at all. I can bend it, but I can't really fold it like I can fold fabric.

Typical electronics components are rigid; the solder joints are more durable if they are soldered to a non-stretchy material.

Typical fabric is slightly stretchy along the bias; it's more durable if the things sewn to it are also slightly stretchy.

Is there an optimum amount of flex and stretch and foldability for something intended to sit between rigid electronics components and stretchy, foldable fabric?

  • Login or register to post comments

Great demo! Are these soft

ktoksu — Sat, 05/22/2010 - 11:02

Great demo! Are these soft circuits washable? Do you know how many washes they can tolerate before the copper starts coming off?

  • Login or register to post comments

This is awesome! These a

spiralred — Fri, 04/30/2010 - 09:29

This is awesome! These a suuuper cute and this is so easy (I've never seen sharpie used as a stop-out before). I'll have to experiment with this really soon. Is it ok to use nitric as my etchant or does it need to be ferric chloride?

I'm so excited, this is too awesome.

  • Login or register to post comments

Friends of SPWS:

Silver Goggles
Beyond Victoriana
Steampunk Magazine

Search

Projects

Keyboard

LCD Monitor

Light Switch Plates

Wimshurst Machine

MAC Mini Mod

Altoids Tin Etching

Lightbox

Guitar Amp

Lyra's Lamp

Shop Respirator

Etching Brass

Flash Diffuser

Bus Conversion

All-in-One PC

Motorbike

Etch Machining

iPod Etch

Headphone Mod

Steampunk Strat

Telegraph Build

Steampunk Car

Trilobite Etch

Kerosene Lamps

Trailer

Contact

  • Twitter:  Jake |  Meredith  
  • Jake is on  Facebook
  • Jake's older projects
  • Meredith's Blog 
  • Meredith's Etsy Store
  • Jake's Shared Google Reader Items
  • Email Jake: jake@vonslatt.com
  • Email Meredith: satiredun@gmail.com
Creative Commons License
Designs by Jake von Slatt on this site are licensed under a Creative Commons Attribution, Noncommercial, Share Alike 3.0 United States License.
Permissions beyond the scope of this license may be available here.
 
Subscribe to our Announcement List:


Your email will never be divulged and we will only make an announcement when there is a genuinely interesting new thing.

Login

What is OpenID?
  • Log in using OpenID
  • Cancel OpenID login
  • Create new account
  • Request new password

Subscribe

Subscribe to our Announcement List:

Your email will never be divulged and we will only make an announcement when there is a genuinely interesting new thing.

Main Menu

  • Projects
  • Fashion
  • Music
  • Books & Reviews
  • Events
  • Features
  • Upcycling
  • Videos
  • Steampunk Labs Project
  • Kerosene Lamp Project
  • Technical Resource Links
  • Steampunk Links
  • Ephemera
  • Site Search