How to Make a Cheap Lightbox
Jake von Slatt — Thu, 02/15/2007 - 00:00
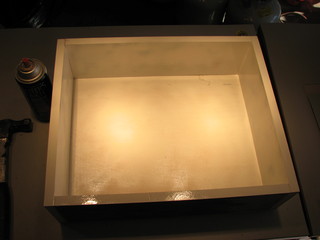
For many of my recent projects I have found myself in need of a lightbox so I took a couple of hours from working on my latest project to put together this one. I used a piece of glass from the old Xerox machine that I bought for ten dollars a few weeks ago. The glass is 14 3/4" by 18". Any piece of clear material will do, but the glass from a copier is ideal because it's tempered safety glass. A flat piece of automotive glass would be an equally good choice. If you do use regular widow glass keep your lightbox on the small side to help reduce the chance of breakage.
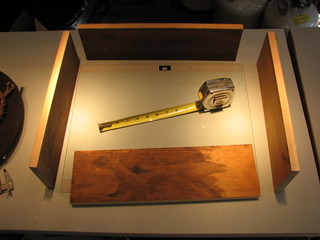
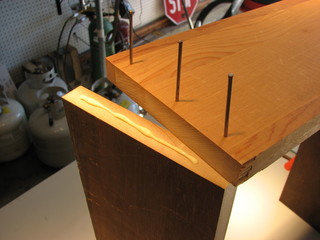
After choosing the glass, I measured and cut some wood scraps to form the box. I used a very simple construction method, just a bit of glue and some nails.

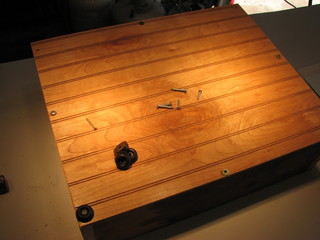
I made a bottom piece from a scrap of paneling. I drilled eight holes and attached it with sheet metal screws. Using screws is important because the glass will be glued on so any future repair that may be required will need to be performed from below.
I installed 3/8" high rubber feet at each corner to raise the box off of the table top. This is important because I plan to drill vent hole in the bottom.

Next I painted the inside of the box with white primer.

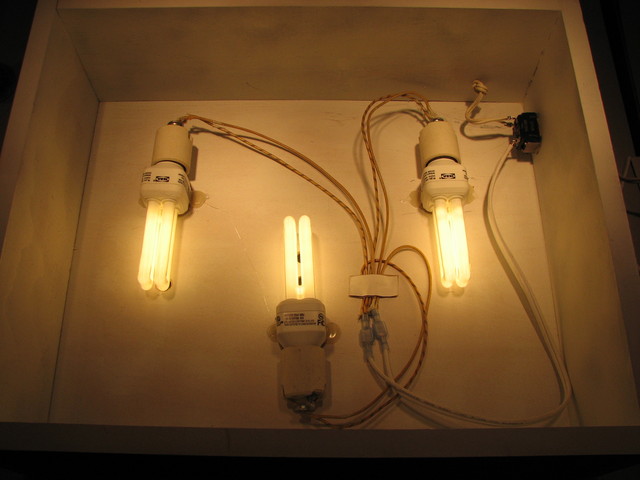
Compact fluorescent light bulbs are perfect for this application because they produce little heat and a great deal of light. These are 11 watt bulbs from Ikea. Once I positioned them I drilled (3) 1/2" holes directly under the tubes.

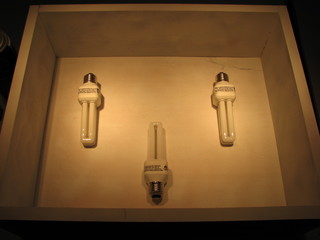
I used sockets salvaged from the light fixtures I stripped to make some of my kerosene lamps. I glued the bulbs down with polyurethane construction adhesive and then tacked them in place with some hot glue because the polyurethane needs several hours to cure.
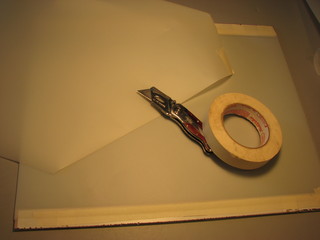
To further diffuse the light I installed a strip of drafting acetate across the lights about 3" from where the glass will be. Charette or an art and/or drafting supply house will have acetate.

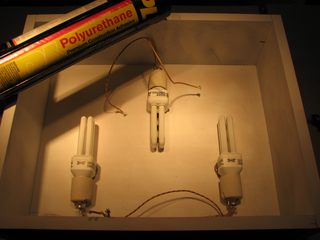
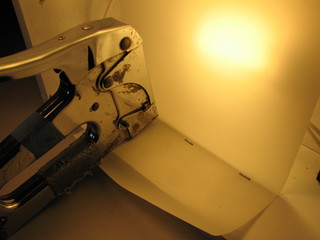
I glued in a toggle switch and wired the lights with a pair of quick disconnects so I can remove the bottom for servicing. The only thing you really have to be aware of when wiring is that the ridged wire in the line cord needs to connect to the white wire from the sockets, this is the "Neutral". The smooth wire in the cord connects to the wires with the black stripe (or they may be solid black on your sockets) this is the "Hot" or "Line".

Here is the lightbox with the acetate strip in place and holes drilled in the back for ventilation. Next step was to tape more acetate to the back of the piece of glass., The copier glass had a nice painted area at the top and bottom to hide the ugly masking tape, you may want to paint something similar on yours. I glued the glass to the top of the box with G.E. Silicon II WIndow and Door Sealant.

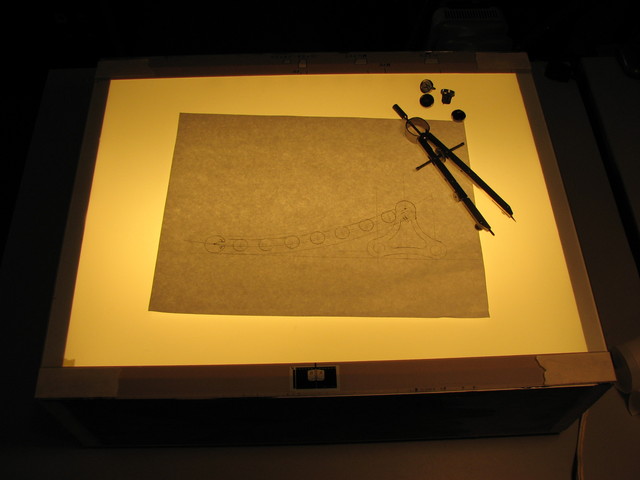
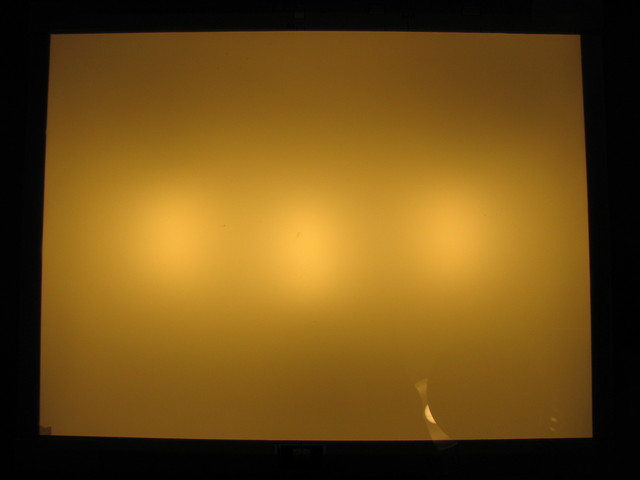
The lighted area of the completed box. You can see that there are bright spots above the bulbs, but the surface is actually quite evenly illuminated.

It works quite well as a lightbox and I'm sure it will be very handy.

Friends of SPWS:
Search
Projects
LCD Monitor
Light Switch Plates
Wimshurst Machine
MAC Mini Mod
Altoids Tin Etching
Lightbox
Guitar Amp
Lyra's Lamp
Shop Respirator
Etching Brass
Flash Diffuser
Bus Conversion
All-in-One PC
Motorbike
Etch Machining
iPod Etch
Headphone Mod
Steampunk Strat
Telegraph Build
Steampunk Car
Trilobite Etch
Kerosene Lamps
Trailer
Contact
- Twitter: Jake | Meredith
- Jake is on Facebook
- Jake's older projects
- Meredith's Blog
- Meredith's Etsy Store
- Jake's Shared Google Reader Items
- Email Jake: jake@vonslatt.com
- Email Meredith: satiredun@gmail.com

Designs by Jake von Slatt on this site are licensed under a Creative Commons Attribution, Noncommercial, Share Alike 3.0 United States License.
Permissions beyond the scope of this license may be available here.
Your email will never be divulged and we will only make an announcement when there is a genuinely interesting new thing.
Login
Subscribe
Your email will never be divulged and we will only make an announcement when there is a genuinely interesting new thing.

.png)

Nice
Larryjensen13 — Fri, 06/25/2010 - 12:26I've been making boxes like these for a few years now and have tried pretty much every type of light and technique known to man. Finally I realized that the most effective way to go about it is by using a Metal Halide ballast for the light source. It's strong, energy efficient and fairly affordable. I've had ample success ever since, but will definitely steal a few of your tips to make my lightbox even better.
I have a question well two really
Cheshirecat — Sun, 01/17/2010 - 05:09If one was to want a bit more light could you do something to give it a little better illumination would it be possible to add in some Led instead? or a type of foil to help reflect some more of the light or would this cause overheating.
Light temperature in ºK
Fernando Gonzal... — Sun, 06/14/2009 - 00:41I was just about to build one, but more compact in size.
I stopped when I couldn't solve the question if I should use cool-daylight lamps or warm light lamps. Cool daylight are 6500ºK, same as my monitor's white point - while warm ones are around 5000ºK, not sure about this last.
I shall use it only for viewing 135mm daylight color slide film, so as to adjust levels and curves and brightness in the scanner software or when making corrections at post-processing.
Advice welcome !
Fernando.
LOL! as you can tell by my
Jake von Slatt — Sun, 06/14/2009 - 09:17LOL! as you can tell by my photos I did not know a whole lot about "White Balance" when I took these shots! The bulbs I used are of the warm white variety and to get a decent image I should have set my camera on "Tungsten" or used the custom white balance setting.
But since I was mainly interested in using the box for tracing rather than examining slide, the issue of color temperature never came to mind.
There are some CF bulbs that are made for photography and have a 5500K color temperature like this one:
http://www.calumetphoto.com/item/ol2003/
They are a bit pricey at $20 each but if color is important, they are the way to go.
CFL's are great
t0cableguy — Tue, 06/23/2009 - 02:35If you know of a good local electrical supply shop that doesnt gouge its non commercial customers you can actually order the bulbs by the Kelvin range.
And.. if you're using CFL's for color correction, make sure you give them a minute to warm up, they tend to be dim when they're first turned on.
lightbox
bitsandbitsy1 — Mon, 03/09/2009 - 12:11hi, great tutorial.
Im looking to create something similar for my catering trailer. It would be a menu display box, including graphics etc, however I am a complete novice with this type of thing. Would you be able to show me how the wiring of the lights are done, and is there anyway to have it powered by batteries rather than the mains, if so how?
Would I also be able to make the box thinner without burning down my business? :)
Any help is appreciated.
Thanks, and keep up the good work.
You may do well using 12v low
t0cableguy — Tue, 06/23/2009 - 02:53You may do well using 12v low voltage track lighting... the kits are getting cheap now and you can do away with the transformer and connect it directly to your 12v battery source. maybe lighting it from in front, instead of backlighting it? you could make it chalkboard or wood, or whatever, even go for the steampunk look?
Brightness
3163349 (not verified) — Wed, 04/09/2008 - 18:21Hi, i'm in the process of building my own lightboxes. Was just wondering if you think 3 x 11W bulbs provide sufficient illumination to use the lightbox without having to go into a dimmed room.
Or whether i should up mine to the 15W bulbs?
I think it all depends on the
Jake von Slatt — Thu, 04/10/2008 - 07:55I think it all depends on the media you're using. My photography here is rather less then ideal, the box is brighter then it appears. Oh! do increase the ventilation if you increase the size of the bulb, more wattage means more heat.
Transparency Film
3163349 (not verified) — Sat, 04/12/2008 - 12:01I'm planning on mounting transparency film onto them, then mounting on the wall. So hopefully most of the heat will rise out of the box and not melt the film.
I'll keep you posted on the happenings, if your interested!
Transparencies need relatively little light
steviesteveo — Tue, 01/20/2009 - 06:55You don't need to blow out the viewer's eyes to light a transparency, you need enough to make the white sections white but you should also avoid going too far and making the black sections brown. Also remember that the visual impact of your transparency display is greatly lessened if your viewer is squinting at it because of the lightbox.
Too dim is terrible for transparencies but too bright is equally unfortunate. That said, modern film is quite resilient to heat (it's been a long time since people have had film melt in their camera) and you rarely need to go as far as anything like cooling equipment.
CFL's
t0cableguy — Tue, 06/23/2009 - 02:41I'd worry more about the cfl's burning up than anything. Make sure you have some sort of air flow for them. Most CFL's are rated to be in a fixture with an open top, to provide cooling. Believe it or not these bulbs do get hot, although not as hot as a regular incandescent of the same output.