|
Prepare the charge collectors:
-
Use a hacksaw to cut off the nail ends of the pipe hanger. The overall length should be 5".
-
You'll find small brass ball cap nuts in the electrical section at the hardware store; they are most commonly used to secure the top of brass outdoor lighting fixtures.
-
Place the small brass ball nuts on the ends of the hanger, heat them with a small torch and apply just enough solder to fill the joint. Note: Be careful not to overheat the pipe hanger, it is copper plated steel and it you heat it too much the solder may not adhere.
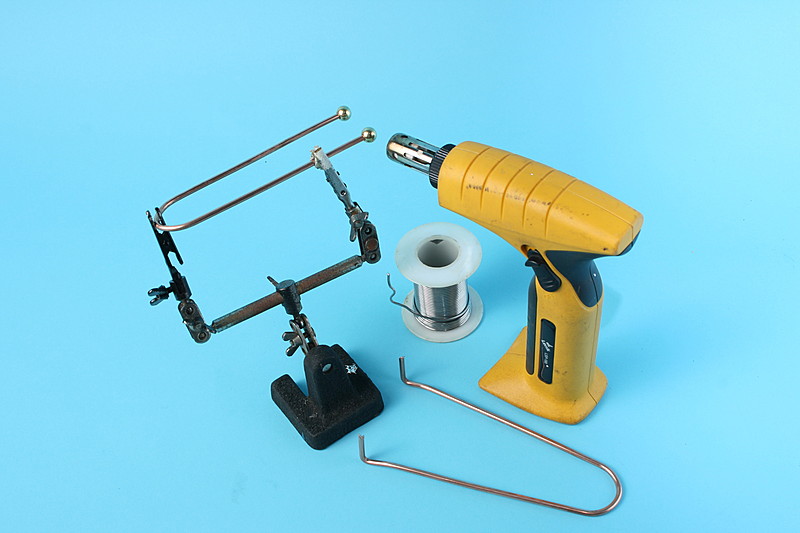
The torch pictured is a Lenk LSP-180 butane torch/soldering iron and it is a marvelous tool.
|
wimshurst-solder-balls.jpg
|
|
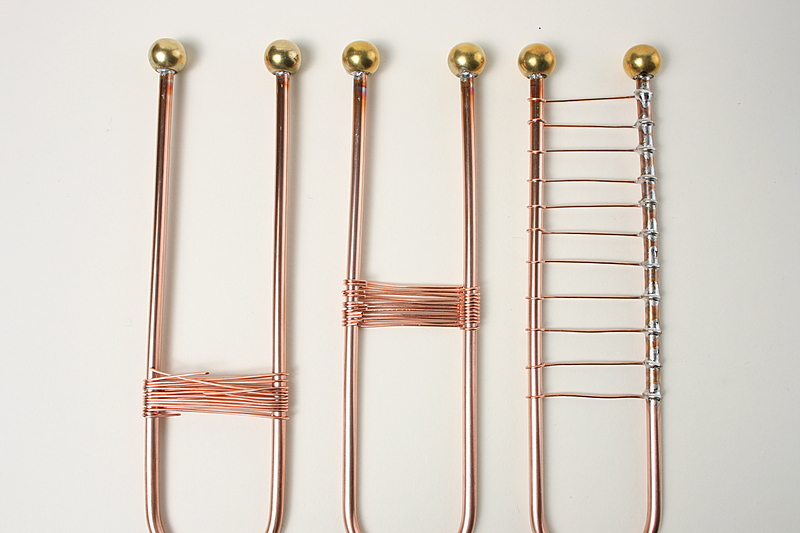
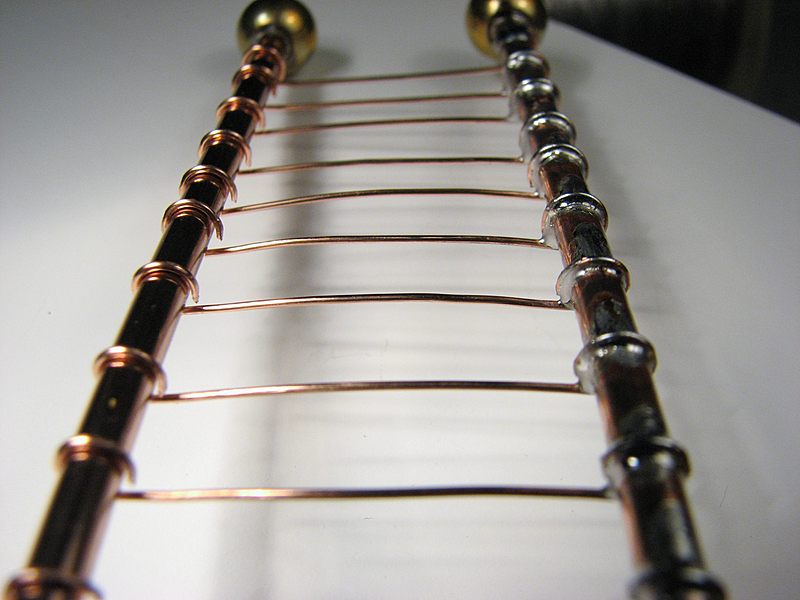
Attach the collector comb prongs:
-
You need to make 8–12 pointy prongs down each side of the collector comb. I stripped the conductors out of a 3' section of telephone wire to make them.
-
Wrap the copper wire around the pipe hanger as shown in the left-most example. I made 11 turns.
-
Cut away the center portion of the wire on one side only and bend the cut ends around the pipe hangers.
-
Spread the prongs out evenly along the portion of the charge collector that will be opposite the sector.
|
wimshurst-prongs-progression2.jpg
|
|
Solder the prongs:
-
Crimp the ends tightly around the pipe hanger.
-
Use a large soldering iron to solder each joint. Apply sufficient solder so that when you take the soldering iron away solder flows down to fill the gap at the end of each length of wire. We want to avoid any points other then the prongs themselves.
-
Once you've soldered all of the joints cut down the center of the wires but don't trim them to length until it's time to install the combs.
|
wimshurst-solder-prongs.jpg
|
|
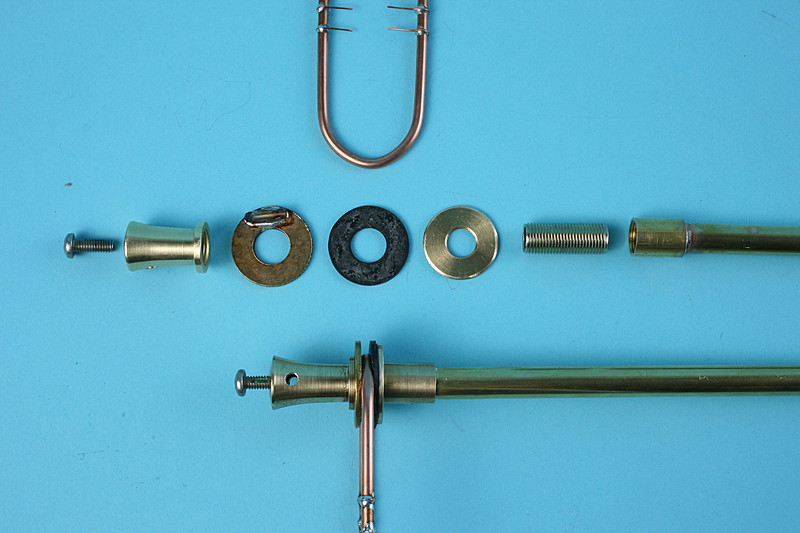
Charge collector mount:
I made a couple of different collector mounts using various lamp parts and cabinet knobs. This was the simplest, but you may have to improvise if you can't find these particular lamp parts at your local hardware store.
Pictured here right to left:
-
3/8" OD thin wall brass tubing 6" long
-
3/8" threaded collar
-
3/8" lamp "nipple" 1" long
-
Lamp washer nut (threaded)
-
Rubber flat washer
-
3/8" brass washer
-
3/8" threaded lamp finial
-
#8-32 screw
Prepare the collector mount:
-
Using the step drill, bore out one half of the threaded collar.
-
Screw the nipple halfway into the collar and insert the brass tubing into the opposite end and solder it in place.
-
Drill one hole straight down into the top of the finial and thread with a #6-32 tap. Use the drill size written on the tap.
-
Drill a 1/8" hole through the body of the finial as pictured, this is for the discharge electrode.
-
Cut a ½" length from the extra you trimmed off of the pipe hanger earlier and solder it to the brass washer, this will allow the assembly to clamp and hold the charge collector perpendicular to the support.
-
Test assemble the mount and then disassemble and set aside.
|
wimshurst-collector-assembly.jpg
|
|
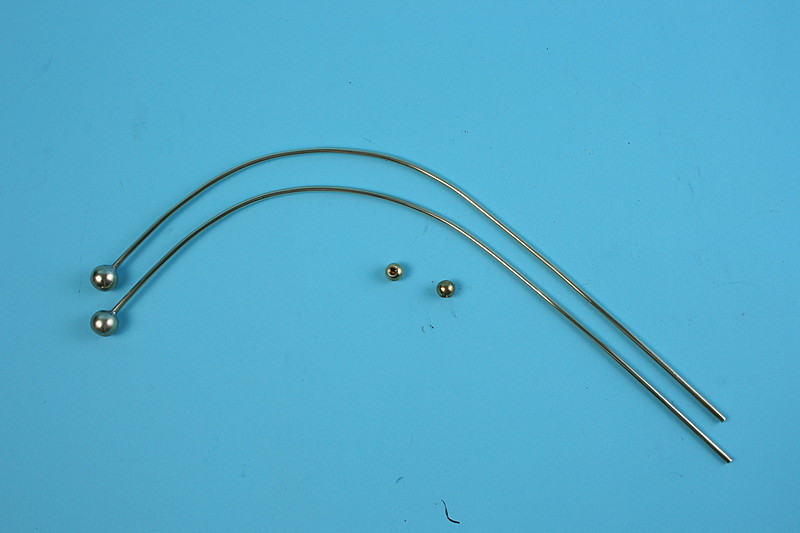
Prepare the discharge electrodes:
-
Cut two 15" lengths of brazing rod and bend them as shown. I bent mine by hand but you could bend a 30" length around a five gallon pail and then cut it in the center for a neater appearance.
|
wimshurst-discharge-assembly.jpg
|
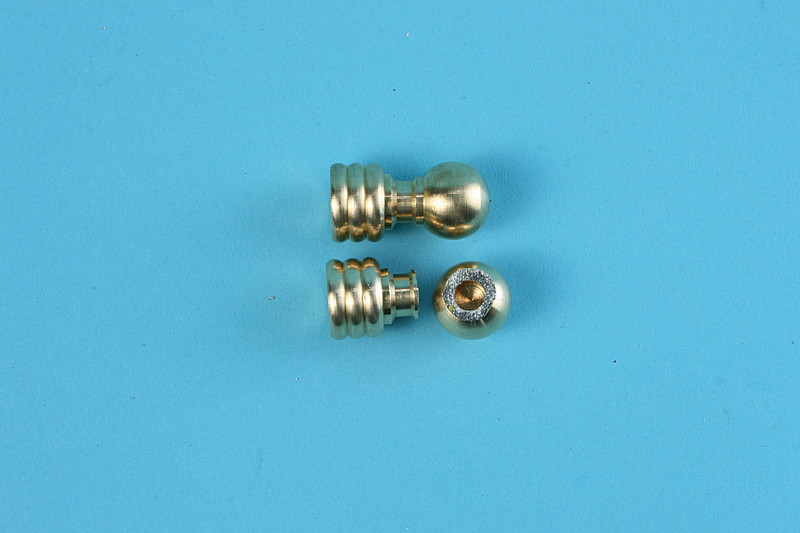
-
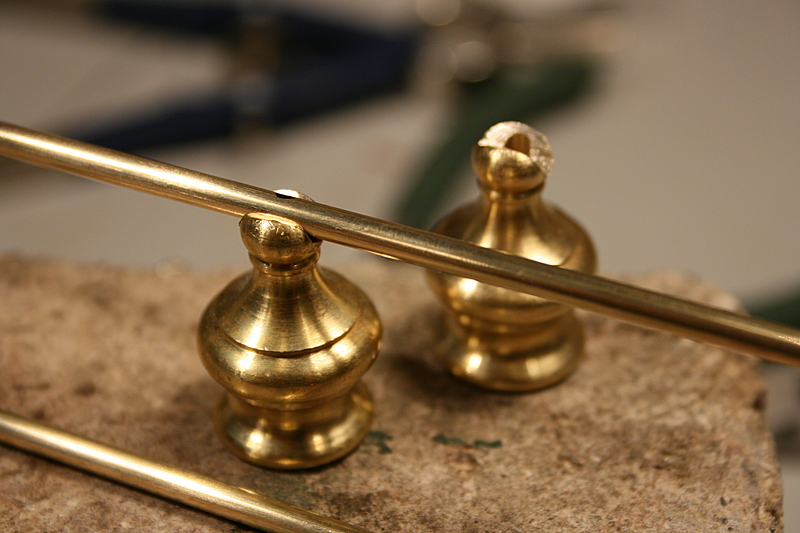
The balls for the discharge electrodes come from some more lamp finials, cut them off just below the ball with a hacksaw. These balls are about ½" in diameter.
|
wimshurst-discharge-ball-cut.jpg
|
-
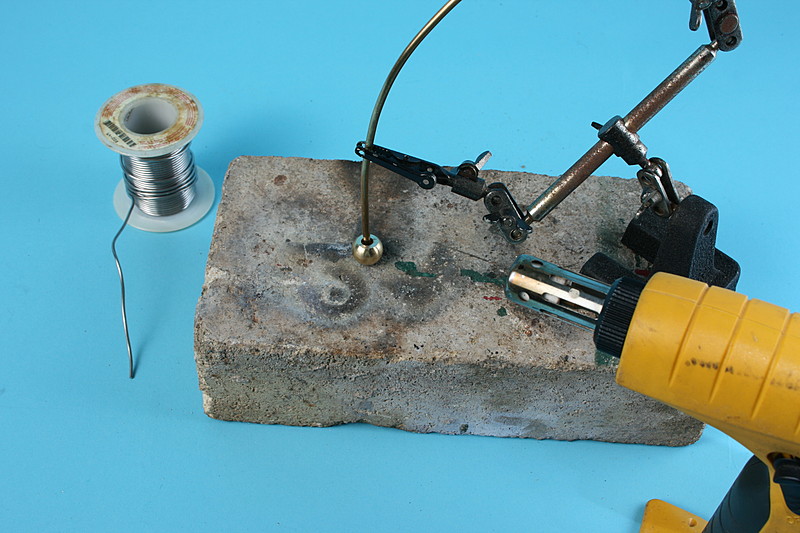
Solder the discharge balls to the electrodes; fill the hole with solder so it makes a smooth transition to the rod.
Note: do not solder the small ball nuts in place!
|
wimshurst-discharge-ball-solder-prep.jpg
|
|
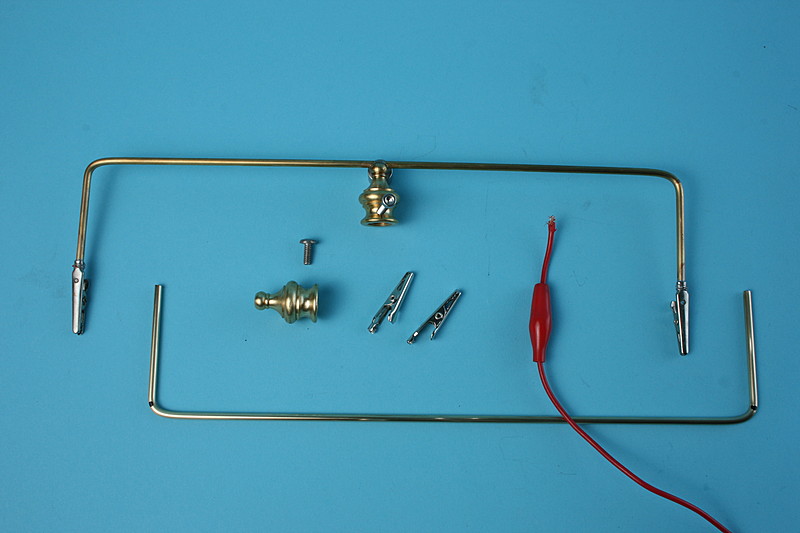
Fabricate the neutralizing brushes:
The neutralizing brushes are made with more brazing rod, alligator clips salvaged from a pair of clip-leads, and yet another type of lamp finial.
|
wimshurst-neutralizer-bar-parts.jpg
|
|
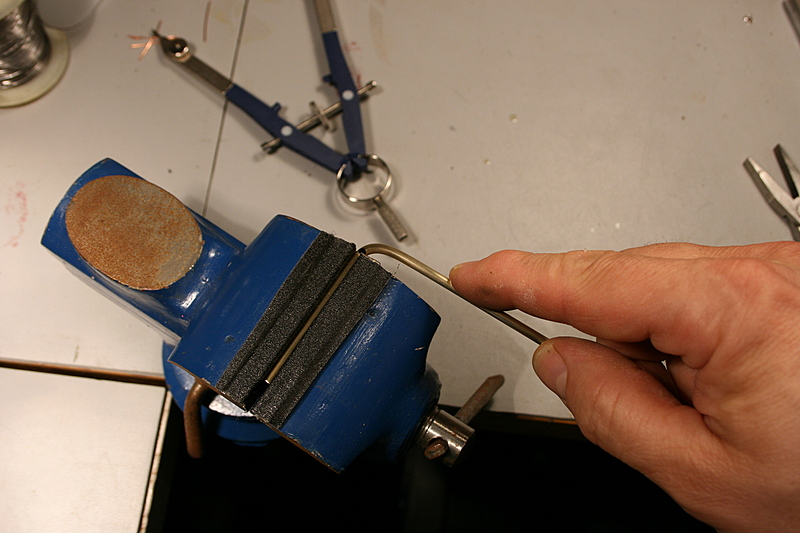
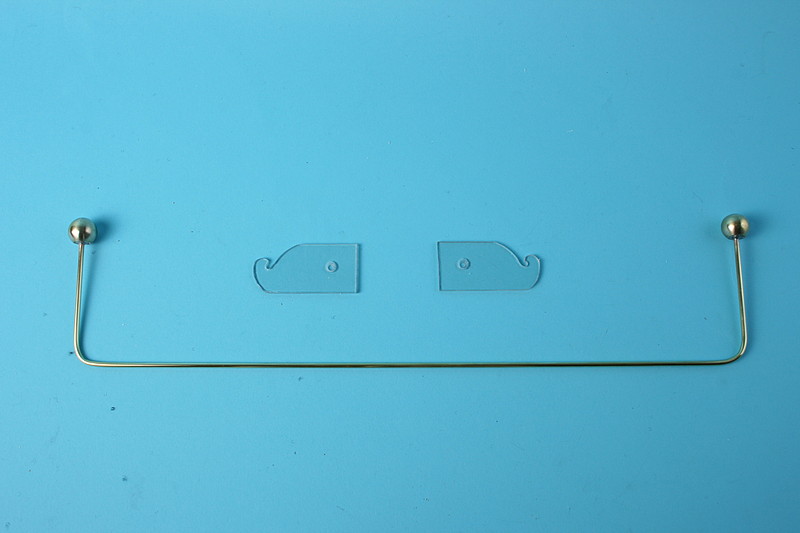
Bend the brush support:
-
Cut a length of brazing rod 14" long and mark it 2" from either end.
-
Make (2) 90 degree bends in the rod at the 2" marks.
|
wimshurst-neutralizer-bend.jpg
|
|
Solder the brush support to the brush boss:
-
Drill a hole for a set screw in the base of the finial and tap with the #6-32 tap.
-
File a groove in the top of the lamp finials, these particular finals have a 3/8" threaded hole in the bottom and a small hole in the top. I think they are made for ceiling fixtures that have a center pull string.
-
Center the neutralizer bar on the finial and prop it so its parallel to the workbench top and solder it in place.
|
wimshurst-neutralizer-hub.jpg
|
|
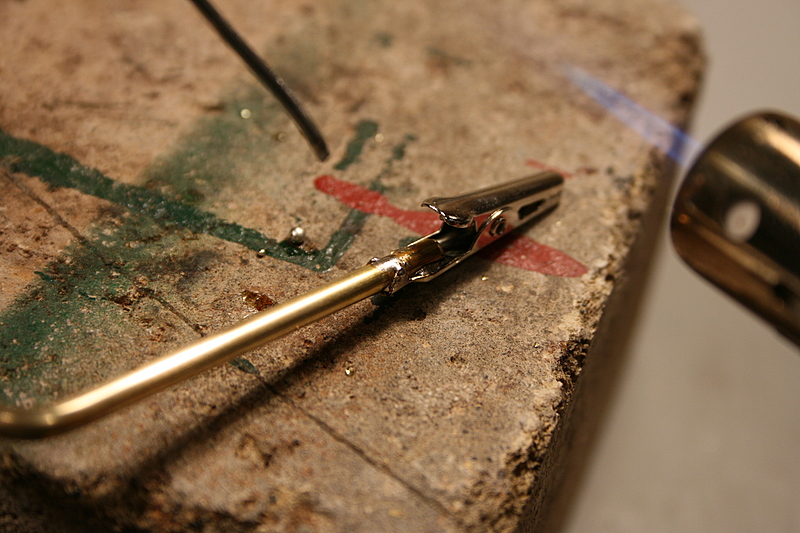
Attach the brush clips to the support:
-
Crimp the alligator clips on to the ends of the neutralizer bar and solder.
|
wimshurst-neutralizer-clip.jpg
|
|
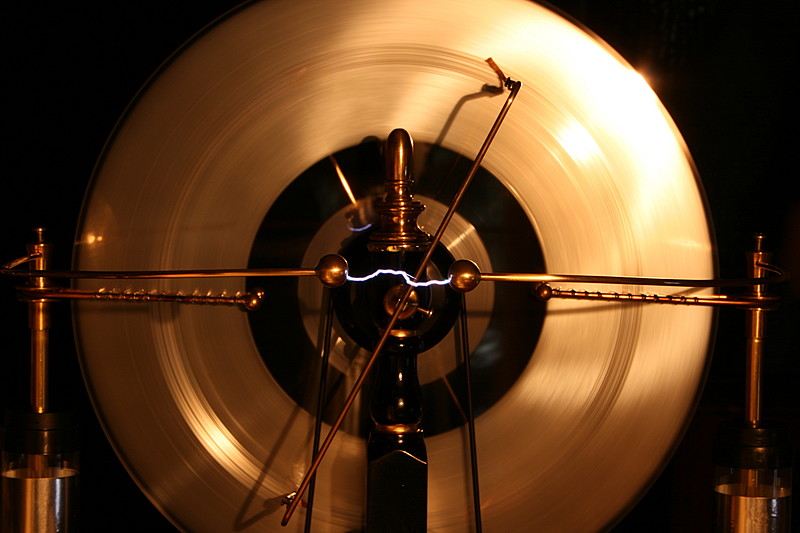
Fabricate the Leyden jar shunt:
-
Cut a 22" length of brazing rod.
-
Make 90-degree bends, 3 ½" in from each end.
-
Solder two brass balls to the end. These are the large brass lamp chain pull balls, smaller finial balls or cabinet knobs would work here, too. If you use knobs be sure to remove any lacquer finish.
|
wimshurst-layden-shunt.jpg
|