Jump to Navigation

Copper Plating and Etching Altoids Tins

With this project I wanted to try a number of new things:

  • Magazine pages as cheap toner transfer media
  • Copper electroplating
  • Etching Altoid tins with a salt water solution

The copper plating met with mixed success, but the other two methods resulted in some nice pieces.

Note: blue vitriol and muriatic acid are archaic names for copper sulfate and hydrochloric acid.

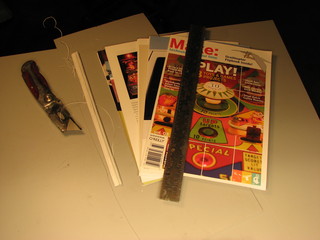
Magazine pages for toner transfer:

While looking for information on transferring toner using a fuser assembly from an old laser printer I ran across several websites where people suggested using glossy magazine pages for transferring printed circuit board images to a copper substrate.  I thought I'd give this a try for etching Altoid tins, so I cut up a likely magazine.

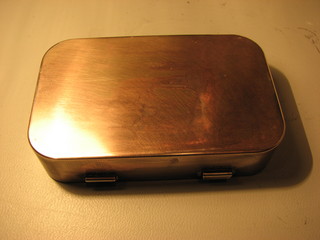
Preparing the Altoids tins turned out to be harder then I predicted.  The paint stripper I use comes in a spray can and is sold as "Paint & Epoxy Remover." It's strong stuff.  If you get even a drop on your skin it hurts like hell and you need to flush the area with lots of water to make it stop.  Most paints just wrinkle up and fall off when I hit them with this stuff yet the paint on the Altoid tins required several minutes of scrubbing with steel wool while wearing nitrile gloves (latex gloves fall to pieces in seconds.)

cutting up Make: magazine  Altoids tin and Scotchbright

Next we:

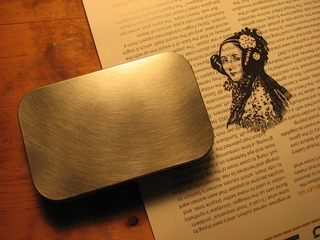
  • Print the image on a magazine page
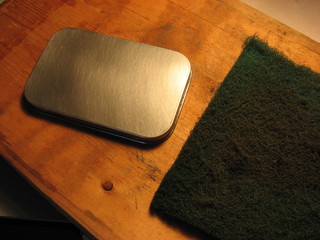
  • Rough up the surface of the Altoids lid with Scotchbright
  • Clean the lid thoroughly with alcohol
  • Iron the image onto the lid

I cut a block of wood the size of the base to support the lid while I pressed down with the iron.

This is the Lady Ada Lovelace, a contemporary of Charles Babbage and a woman oft sited as the first computer programmer, she having written a series of notes comprising an instruction set for calculating Bernoulli numbers on Babbage's Analytical Engine.  You don't get more Steampunk then that!

altoids tin and lady ada  toner mask on altoids tin

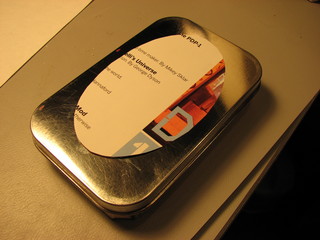
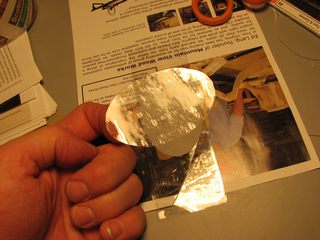
Once the transfer is ironed onto the tin you soak it in water and then carefully peel off the paper, layer by layer, leaving just the toner behind.  To get the last of the paper off just gently rub with your thumbs.

soak altoids tin  packing tape mask

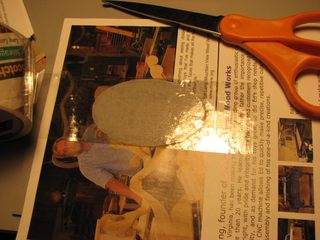
I used the cut-out in the magazine page as a template for cutting a mask from packing tape, I wanted to only copper plate part of this tin's lid.

So far all of the toner transfer methods I've tried; Laser printing on Inkjet paper, Press-n-peel blue, and magazine pages, have worked just fine.  Press-n-peel is probably the easiest to peel off, but the hardest to iron on if there are large solid areas of toner.


Copper Plating Altoids Tins:

tape mask  altoids tin with tape mask

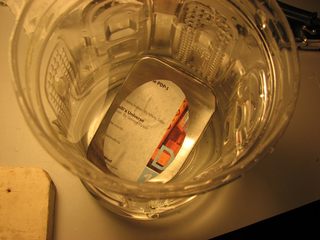
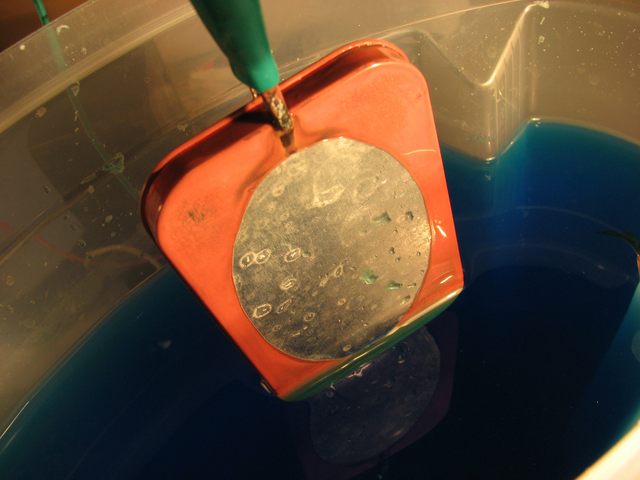
For my first attempt at copper plating I simply connected the lid to the negative side of a 1.5 volt power supply and dipped into the blue vitriol (copper sulfate) solution that I have been using for my brass etching experiments.  I used a length of copper tubing for my anode.

From the picture below, this appears to work.  Alas, what you see is just a coating of copper powder, nothing has actually stuck to the tin plate on the Altoids tin.

copper electroplating altoid tin


I speculated that perhaps my solution was contaminated so I did a little research (see Technical Links) and tried a solution with a different composition.  I filled a container with about a gallon of water and added  a table spoon of Muriatic acid (25% HCl) and a pinch of salt.  Since you can't plate copper out of the solution until there is copper in the solution I inserted a dummy cathode and run the cell with the 1.5 volt power supply for about 6 hours.

After this time the solution had a faint blue tinge and I replaced the dummy cathode with the tin.  Unfortunately, results were identical to the earlier attempt.

For my next attempt I connected the metallic barrel of a painters brush to the positive side of my power supply and the negative side to the Altoid tin.  I dipped the brush in the blue vitriol solution and "painted" it on the tin.I actually had some success with this.

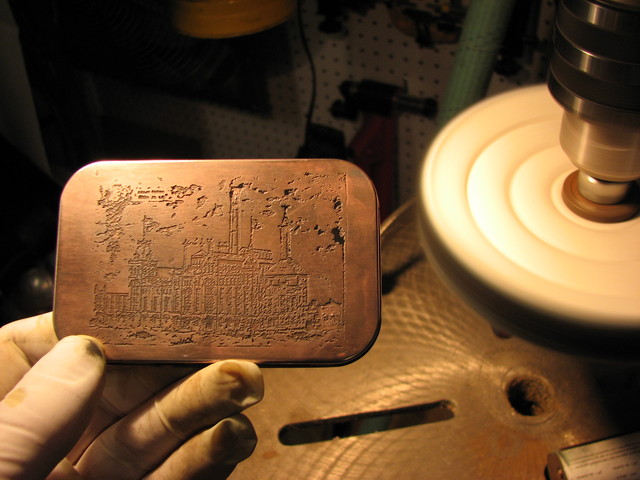
However, the most successful technique turns out to be the simplest, simple apply a solution of blue vitriol with a cotton swab using a circular motion.  Q.E.D.

electroplating altoids tin  copper plating altoids tin

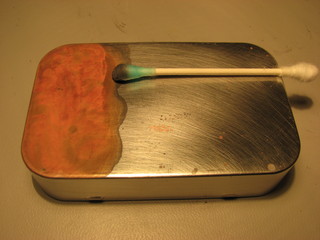
You can vary the qualities of the surface by using different strokes to lay down the copper and you can polish the resulting plate on a buffing wheel with a touch of rouge.

plated tin  polished tin


Salt water etching Altoids Tins:

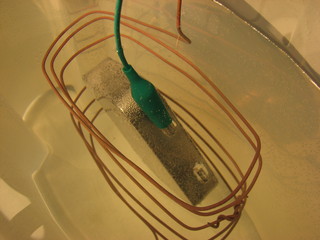
The next thing I wanted to try was etching the Altoids tins.  I printed and applied a Press-N-Peel blue mask to one of the tins and attached it to the positive side of a car battery.  A piece of copper pipe was attached to the negative side and both electrode and work piece were immersed in a gallon of water that had approximately 2 cups of salt dissolved in it.

salt water etching altoid tin  salt water etching bath

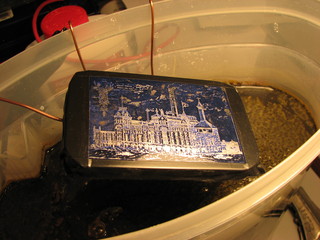
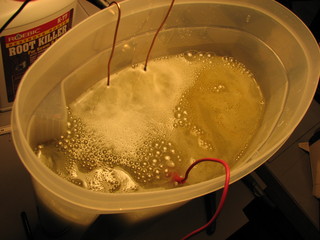
The salt water started to bubble furiously and a dark murky green-brown precipitate began to form.

high surrent etching steel

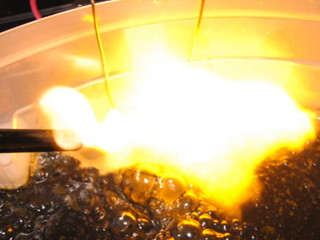
Foom!  "Ah! the bubbles are indeed hydrogen."  

After about 7 minutes I took the Altoid tin lid out, rinsed it and used paint stripper to remove the toner mask.Seven minutes was probably just a bit too long as you can see by the perforations in the upper right.

burning hydrogen  etched altoids box

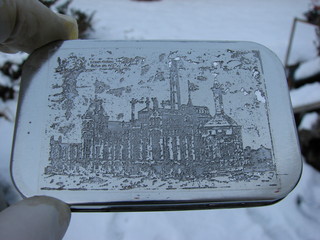
I then coated it with the blue vitriol (copper sulfate) solution using the cotton swab method and polished it with a buffing wheel and a bit of rouge.

polishing copper plated tin

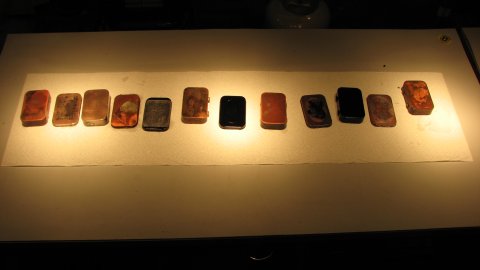
In all I made half a dozen tins using slightly different methods.  Some of the early plating experiments actually turned out to be quite pretty once I sealed the powdery copper layer with a coat of lacquer.

half dozen tins


The finished results:

finished and copper plated tins

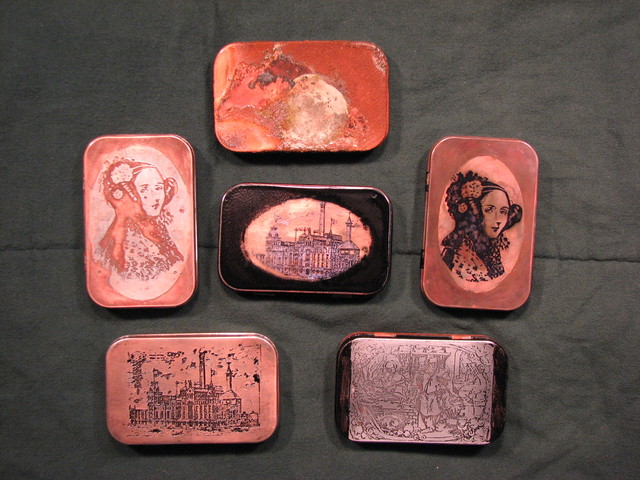
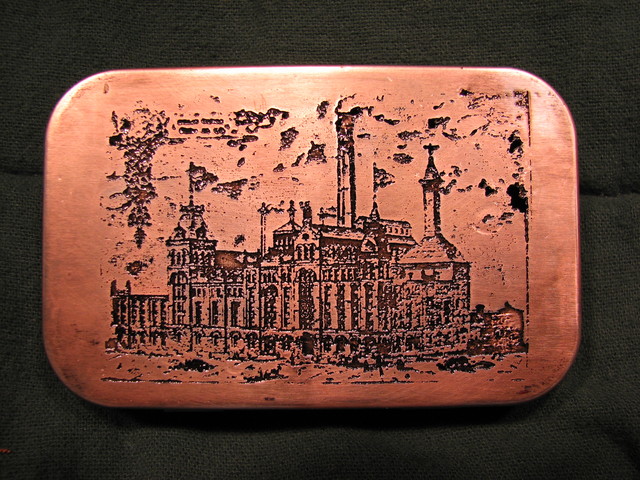
This one is a straight salt water etch with a bit of black paint to bring up the details and a finish lacquer coat.

etched kitchen scene

This is a salt etch with a layer of copper applied using the cotton swab method and blue vitriol solution.  It was then polished with a buffing wheel and a bit of rouge.  

etched factory

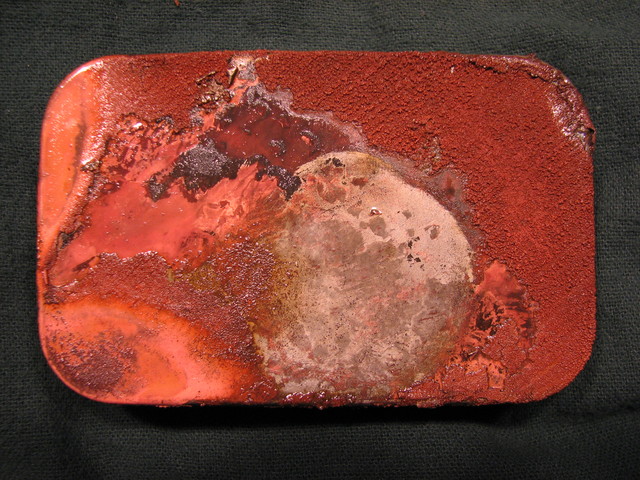
My first plating attempt was a failure but looked so interesting I put several coats of lacquer on it to fix the powdery copper bits in place.

copper mess

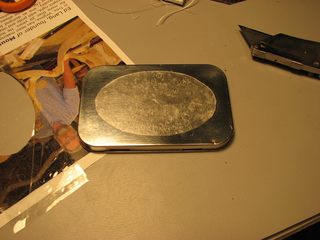
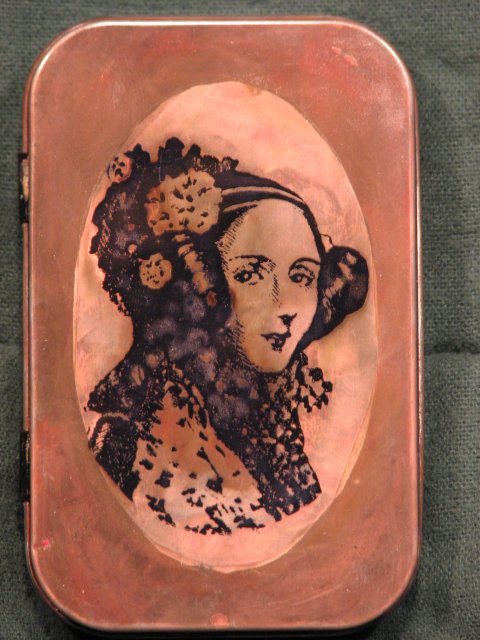
This Altoid tin was masked with an oval piece of packing tape and then lightly etched.  Next the mask was removed and a positive toner image was ironed on.  Finally the tin was plated in copper using the cotton swab method and the whole thing lacquered.

ada tin 1

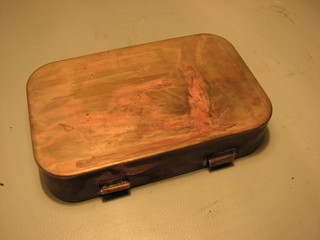
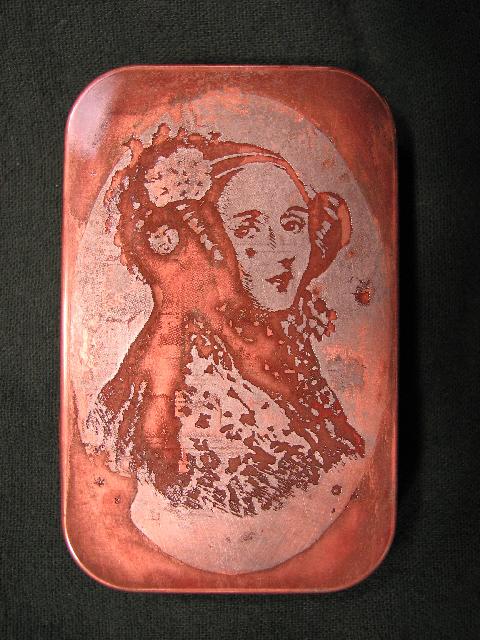
The tin below is the big success of the batch.  It was a straight salt etch and had the blue vitriol solution carefully applied to certain areas with a cotton swab.  The etched area was cleaned up a bit with some 400 grit paper and the piece was lacquer sealed.


lady ada altoids tin

The Lady Ada Lovelace


Comments

Nice work!

I am starting a project soon and I need some advice: Can you detail for me how to make a batch of blue vitriol? I intend on etching a cast aluminum enclosure for a guitar effects pedal, then "painting" it using a q tip and blue vitriol. I'm going to acid etch with PnP blue, then plate. The only step I'm unsure of is the creation of the blue vitriol...

Any pointers?

-Subbacultcha

I have managed to acquire most of the necessary ingredients and would really like to give this project a go but I have a few questions. When you coat the tins with copper sulfate using a cotton swab, do you then use the electroplating method to make the copper actually plate the surface of the tin? Or does it merely attain that color simply by applying the solution? Also, the project I want to do is a stainless-steel hip flask, do you think there would be a problem using stainless? I couldn't find root kill but I managed to find "Root Killer" by Roebic, it's crystals, not powder, but I'm hoping it will dissolve just the same. Thanks in advance for any answers you might be able to provide. Dr Wicked

I just rubbed the solution on - however, I think that it will not work with stainless steel, but the only way to find out for sure is to try it.  The Root Kill I had came in the form of blue crystals too.

Hi, I would love to try this out with my students. The etching is no problem but how do you make or where do you buy the blue vitriol solution? thanks.

 The hardware store, it's simply "Root Kill" (which is Copper Sulfate Pentahydrate) and water.
See: http://steampunkworkshop.com/electroetch.shtml

Thanks, I looked and there is both liquid and solid varieties. so you just swab it on and polish? my students are going to love this. I finished my etching power supply earlier today. not steam punk, but maybe once I get goin I can make it look a bit nicer.
I saw from that link that the blue vit is what you use to electro etch brass plates. but its used to copper plate tin? would it both etch and plate tin at the same time?

Great bits of inspiration and information on your website, thanks!

One thing to try is sodium bisulfate solution, a "pickle" used by jewelers. I've used this method, sometimes accidentally (%$%#@&*) on silver, and brass. It may work on other metals, I haven't tried it.
To get copper into the solution, just soak some old chunks of copper pipe or scraps of copper, for a few hours, or better, for a few days. The solution will take on that blue tint.
Once the solution has copper molecules in it, you place whatever you want to plate in the solution, along with a piece of iron or steel. The steel causes the other bit of metal to evenly plate itself, usually in a matter of 10 minutes or so. The solution works best if warm, not boiling.

cheers,
r

Did you use any electricity when you were using the cotton swab to paint on the blue vitriol? How did the copper adhere to the tin?

No electricity, the copper plates out onto iron/steel without it.

The annoyance with an altoids tin is the trademark is embossed in the lid rather than just painted on it. If one is still using the tin for Altoids, just making it Victorian, this technique is amazing. But do you, Sir, or any of your readers know of tins of a similar size and shape which lack the embossing but are otherwise appropriate for this treatment?

--Shawn

Not all Altoids tins are embossed, but it can be hard to get the paint off.  These guys have unpainted flat top tins: http://www.specialtybottle.com/index.asp?PageAction=Custom&ID=41

We've had a hell of a time duplicating any of your results, though we did manage to destroy some Altoids tins and produce some cool sulphur crystals. As far as I can tell the ironing from printing on a magazine page just does not work and the transfer film is almost impossible to get hold of. I did get some pretty good results with the copper plating on a steel switch plate, but the results on the cheap metal of th altoids tins are very uneven.

Dave

Further research has taught me that the flimsy coated paper used in the Sunday paper circulars works the best, you'll need to make a "sled" by folding over the top 3/4" of a sheet of printer paper to get the flimsy through the printer. 

Set the iron on high and place the transfer onto the tin with a couple of presses. Then use a popsicle stick to rub over every inch of the tin while applying het.  Do that continuously for a minute or two.

Printers are also a big variable so try a few different ones.

The tin plate on the Altoids tins seems to react with the copper sulphate to make a mess, try adding a little white vinegar or muriatic acid.  I just did some tins by alternating between a copper sulphate soaked q-tip and one with a muriatic acid solution and I was able to get a very nice patina.  Wear safety glasses when play with acid.

Buff VERY lightly with 000 steel wool to polish.

Does the transfer have to be a laser printer or can it be a ink jet printer?

It has to be a laser printer and you may have to try different ones. It could also be a photo copier.

I've been experimenting with this technique a bit recently, and have found it very effective. Some of my results are displayed at http://frazer-makingstuffup.blogspot.com

ok I found some root kill and mixed up the BV. My power supply didnt have enough juice so I switched to my rechargable battery jumber box and it worked quite nicely. I havent found a reliable source for tins yet but I did find some button parts in the closet from a badge a minute set so I used those. here are links to the results.
the original
[IMG]http://i43.photobucket.com/albums/e370/Hunter789/SANY0091-3.jpg[/IMG]
the results
[IMG]http://i43.photobucket.com/albums/e370/Hunter789/SANY0089-2.jpg[/IMG]
and the side by side
[IMG]http://i43.photobucket.com/albums/e370/Hunter789/SANY0092-2.jpg[/IMG]
now I just need to work on a more sophisticated resist method. for the H I covered the button in duct tape and used an exacto to cut out the letter.

While I don't claim to be a chemist or anything of the sort, I believe I know why the method of just brushing on the Vitrol solution works to plate the tins. I believe it has to do with a process known as 'galvanic reaction' in which a small electric current is produced when 2 dissimilar metals are placed in close proximity to one another (one of these metals being the tin itself and the other being the copper that is suspended in the Vitrol solution). Persons with a mechanical background may be familiar with the corrosion that often occurs when steel fasteners are used with aluminum parts (common problem encountered on newer vehicle waterpumps and thermostat housings), this corrosion is a result of 'galvanic reaction', often times this reaction results in oxidation which can make it difficult to disassemble items where 2 dissimilar metals have indeed come in contact with one another, such as brass fittings used on aluminum tubing, or brass fittings used on steel or iron pipe, and of course steel (or iron) fasteners used with aluminum.

If you want to know more about galvanic reaction and 'Galvanic Cells' I recommend you checkout the following articles on Wikipedia:

http://en.wikipedia.org/wiki/Galvanic_cell
http://en.wikipedia.org/wiki/Galvanic_corrosion
http://en.wikipedia.org/wiki/Galvanic_series

For those what were curious about the brush on method of plating I hope this helps to answer any questions you had regarding why it works.

And as always Mr. von Slatt I hope you continue to bring us even more steampunk related articles.

http://i43.photobucket.com/albums/e370/Hunter789/plate-1.jpg my first real attempt at this process. I have not been able to get the phot copier transfer to work so I went with a spray paint and scribe technique. It is done in a 5X7 mild steel plate (low cardbon weldable steel available at any hardware or farm supply store) and plated using root kill. My power source was a rechargeable Automobile jumper box. now that I think I have it down I will try some more complex drawings. I didnt want to waste a lot of work if the etch was a bust.

Where would I find a buffing cloth, or could I just use an old glasses cleaning cloth? Also, when you say 'rouge' do you mean the make-up? Or is it some other substance?

 Any soft cotton cloth will do. "Rouge" is a fine abrasive power in a wax base - a hardware will likely have it.

Great! Thanks! Love the website!

Is it possible to tell if the toner transfered sucessfully?

 Yeah, you won't be able to rub it off with your fingers, even if you rub quiet hard.  Read all of  my comment below for some hints about things I've discovered since writing this article.

does the ink transfer over? like, will i be able to see the pattern on the steel surface of the tin?

a few other questions i have:

Instead of using the salt water etching, will acid do? i have some concentrated Hcl, will i be able to dip it in and etch?

when im ironing on the pattern, (using the Sunday circular paper) do you have a estimate of what temperature and steam settings i should use?

i really like this idea, im trying to make a steampunk cellphone (modeled off the Pharnsworth from warehouse 13), and this really points me in the right direction :D

The ink does transfer.
You can use acid - wear eye protection!!
Dry iron on high heat.
Send me pics when you're done!!

Any tips for removing the paint? im thinking about aircraft stripper, i like how sand paper does but it takes forever to pull off the paint.

Heat from a torch (take a bit of practice) and then Brillo pads is quick and easy.  Epoxy stripper or "Graffiti Remover" does a cleaner job but you need to wear serious protection and use it outside - it's nasty!

I tired it

The toner wouldn't transfer over, it could of been that it wasn't properly cleaned (i scrubbed it with toothpaste then isopropyl alcholhol for 10 mins) or it could be that my iron didn't get hot enough.

What brand iron did you use and about how hot does it get?

I find that using a pyrography tool, (or possibly a soldering iron) with a flat laser print transferring bit works better than an iron. It was created for the purpose of transeferring a laser printed image onto wood and covers a smaller area than a household iron. I find it easier to control coverage than an iron,(i.e. the whole object doesn't get ironed), plus no possible steam mishaps. Super hot though. Hope that helps someone.

I have been making zinc etchings and printing from them for a while at college and am really excited to try copper plating and salt water etching so thanks for the info.

How did you apply the press-n-peel blue? Did you apply it and then iron it, or did you simply apply it and then drop it into the salt-water etch?

I have gotten this to work with tin, do you think it will work with other metals and alloys? Any research on the subject just brings up different forms of acid etching.

Etching shoud work with any metal but avoid anything with chrome in it (including stainless steel) as the resultant chromium compounds are quite a bit more poisonous.  Plating with copper sulfate works with iron, steel, and brass but I haven't anything else.  Oh, it does not work on aluminum.

Hi Jake: I love you etched Altoid tins but could never do this. I'm wondering, do you sell these?
roxy

I have been working through this process over the last week or two and just started to get some good consistent results. There are a few points that took me a while to get right.

For getting the transfer to happen right you really need to clean the surface with rubbing alcohol and steal wool in addition to paint stripper. I found that even after I got some tins from the specialty bottle website that came with no with no paint, i found that they still have some clear finish that makes for a bad etch. so paint stripper, and lots of scrubbing.

also if you leave the iron press on the image for 30 seconds then rub it around for another few minutes, it helps for a solid transfer. The toner definitely transfers better when the metal is cooled in water before removing. And even if the transfer has a few missing spots, it has a cool weathered look.

I found that hitting the tins with a blow torch before the steal wool and toner transfer can add some cool colors that really help contrast the image as well making a good etching surface. and a little after can look cool too.

I think the bottom line is that if you spend a little time experimenting and working out the misses and finding the hits, you can get this to work smoothly. now that i got it down some what, I am going to make a bunch as gifts for friends. Thanks for the sweat project and everyone who posted ideas.

Hi Jake So what are you going to do with your early tins that might not be perfect?
Roxy

Hi Jake,
I read all the posts but haven't found the solution to my problem.
I am practicing on (stripped)Altoids tins and I finally got a little of the copper to plate, after increasing the strength of the solution and buffing the old failed mess off with steel wool. I am following the copper swabbing with white vinegar swabbing after the copper coat dries(vinegar at full strength).
So: 1) Does the solution need to have salt in it or something else I have missed? I heated the water before strengthening the solution for my second attempt. 2) Do I need to wait a certain period of time after applying the copper solution for it to react? (I have been waiting and then reapplying another coat: copper, vinegar, copper, vinegar...)

Thank you in advance!

P.S. I am using Root Kill at about 1/2 tsp. per cup of purified water.

Jake,
Thanks for this project! I made my first ever attempt at etching by using your salt-water method on an Altoids tin tonight, and it worked remarkably well. I used a regular 9V battery, so it took longer, but it still worked just fine. I love it that this can be done with stuff that one might have lying around the house. (I didn't try the plating step yet.) One thing that helped me to get the toner to transfer to the tin was to stuff the tin with folded fabric so I could press down on it without flexing the center of the lid inward. Using the thin magazine paper is also key. I couldn't get it to work at all before I tried that.

I forgot to mention: I also tried painting Speedball screen filler (the red stuff you use for screen printing in conjunction with screen drawing fluid) directly on the tin as a resist. It also worked. I can see that this process has a lot of potential for fun.

Hello everyone! I'm new here. I came across this page while researching copper plating. Now that I have some experience, I'd like to add some comments.
Blue Vitriol - Definitely get the 'root kill' CuSO4.5H2O blue crystals. You'll have a LOT more copper available in solution than if you just use a copper anode.
Also, WEAR GLOVES. I've found that, unlike Hydrochloric Acid, you can't feel a sulfuric acid burn immediately. Sulfuric acid will make skin feel plastic-ey and crackled. If you've been exposed, you'll notice it when you wash your hands with water. Cool water feels like burning, warm water feels like burning. It took two days to develop a white spot on my skin where I touched a coin that I forgot to rinse. Just thought I'd mention this for anyone who's thinking of making this a class project. BTW, I got the sulfuric acid from Sears Automotive Dept., $2.50/quart.
Don't forget to add 300ppm HCl. You need the Chloride Ions. (~$6/gal. @ Ace Hardware)
I don't know why this is working with steel. Everything I've read says you absolutely CANNOT plate copper directly to steel without a nickel strike coating.
I've had some minor success doing this, though. The only way I can get it to work with mild steel is to apply the vitriol via electrified brush to steel that is roughly 750 degrees F.
Please continue posting additional tips regarding Electroplating copper to steel. I'm using the process to obtain interesting finishes on metal sculptures.
I've found a scrap yard that has a plating tank full of nickel bars and nickel sulfate, but I'm a bit apprehensive about mixing a solution with nickel. As I understand it, nickel sulfate and sulfuric acid, when mixed, would produce hydrogen sufide gas, which is deadly. I suppose I'd need to look into bromic acid, but that's getting a bit too advanced and unsafe (environmentally) for my purposes.
Also, anyone know if I can use wax as a resist for the acid etch? Will the metal get hot?

Nice project. Thanks everyone.

I may be able to give some insight into the copper electroplating problem. I am a graduate student in chemical engineering, and my Ph.D. project is on copper electrodeposition. The reason that copper plating on stainless steel has issues for two major issues. First, there is a passive layer on the stainless steel, and this will cause issues for any electrodeposition that you try. On the bright side, you can typically break down the passive layer by pretreating the steel in HCl. This will work for most of the cheap stainless steels (which I'm assuming Altoids uses). The second, more difficult problem, is that copper nucleates really poorly on light metals (zinc, iron, aluminum). This means that instead of forming a nice smooth film, you tend to get a rough, powdery surface that flakes or rubs off. Industry typically uses a nickel strike bath, because copper does adhere to nickel, and you can plate nickel onto stainless steel (zinc and aluminum are harder). The other method (DO NOT TRY THIS AT HOME) is to use a direct copper plating solution containing cyanide as a complexing agent. Cyanide causes copper to plate much more uniformly (cyanide works on zinc too). Unfortunately, neither one is that suitable for a home hobbyist. There is work currently being done on non-cyanide direct copper plating solutions, specifically using other complexing agents at very basic pH, but I cannot find a good, freely available reference to this process. The reason that the Q-tip method may work is the relatively little amount of copper at the surface at a given time. This may prevent the agglomeration of the copper on the surface. I would say that the Q-tip method is a great method for hobbyists, as it is relatively easy. If you for some reason need a much thicker layer, you might try electroplating onto the Q-tip applied first layer, or using a nickel strike (be careful with this, it's not as safe as the copper). You can probably find a number of recipes online, as well as cheap chemical suppliers (e.g. www.sciencestuff.com). If you plate copper sulfate onto a strike layer, be sure you have a relatively large concentration of copper (~0.1 M), good mixing, and the right current density. I would try to use ~ 10 milliamps per square centimeter. You can probably achieve this by hooking an ammeter into the circuit and manually adjusting the voltage to get the right current. Depending on your bath setup and what you use as your anode, the actual voltage will vary from setup to setup. I hope this helps.

WARNING THIS CAUSES VERY CAUSTIC GASSES. USE CARE WHEN USING. Never tried it with other items but it works great on copper. I like to build things out of copper piping. I love shiny new copper but I also love a nice patina copper finish. I got the weird idea to mix bleach and vinegar together. Again this will melt you face if you breath the fumes in. I spray the copper with the solution and just let it set for a couple hours. After I use water and clean off residual chemical. If your project is too big to soak in solution I wrap the pipe with paper towel then drench so the paper towel holds the solution on the copper much longer than just spraying and letting it drip off. If I could post a pic of the end results its good. Oh yeah I have also used that to patina brass which takes on a nice aged patina. After I just spray on a couple coats of lacquer and instant antique.

Thank you for all of this information. I'm a senior in Highschool and i am using this experioment as my senior project. also, thank you to all of the people who posted comments on this page. they helped A TON. Also, i was just wondering about the nickel strike. preparation? creation? where to buy? i don't know much about it. any and all information is much appreciated. :-)

Ello Jake id like to start by saying im a big fan of ur site some of ur stuff is apsolutely amazeing

i wanted to ask about a small problem iv found with the plateing method
i have pure science-grade copper sulate tht i used in normal tap water and i think i mixed it abit to richly i didnt measure but i would say maybe a tsp in a half oz of tap water and the resulting mix worked rather well and looked nice until it dried it then tarnished with a blackish grey look to it and begain to crystalize.
iv found tht the crystals formed ar the sulfate and can be wased off but the black haze im still lost on and i cant seem to remove it i was wondering if u had any tips on preventing or removeing this

and on a side note the sulfates are poisonous but can be washed off with a simple rence with warm water however if u plan on putting multiple coats on like ive done with a weaker the forming crystals help alot due to the fact tht they add somthing for the mix to collect on wehere as wen u wash it the copper tends to smooth the surface of the metal makeing it waterproof

I've used different magazine paper and different types of printing yet it will not iron on any tips ( I'm English and have never seen press 'n' peel when i have looked)

I know this is late and you may have heard this already but in mixed media art I've found that using acetate sheets (the types of sheets that are used on overhead projectors) work really well. You run them through a printer and put them face down on your surface and press evenly with a roller or some other tool. Let it dry a bit then peel it off. It's easy and works without the mess of the paper possibly left behind. Just an idea. Love the etchings you've done. They are gorgeous

Wonderful work you did here. It's absolutely stunning.

I have a few questions about the salt water etching. My brother is undertaking a project for etching a metal flask of his, and we've been having trouble acquiring instructions. It seems that we have the gist, but no real clarity. Would it be possible for you to give me slightly more detailed instructions or advice? Any help would be appreciated.

Thank you,

Adella Whitimore-Hazzard

Hello Jake,

If you think stripping the paint from consumer-grade Altoids tins is a daunting task, try stripping the Mil-Spec ones. I'd tell you how, but I'm still waiting for my shipment of antimatter to arrive. :-)

Have a great day and thanks for all these wonderful projects you've posted here. What a fun site!

Tex

This is a great tutorial, thank you!

Does anybody know where one can purchase blank tins???!!!

Pages